Introduction to Banana Pudding with Vanilla Wafers
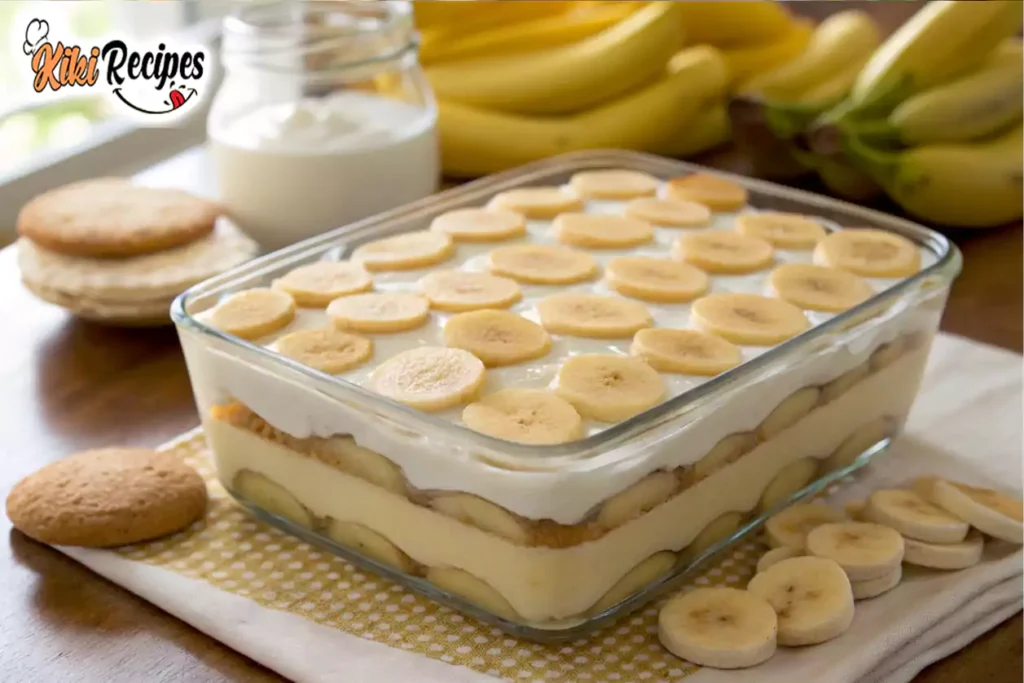
Banana pudding with vanilla wafers is the kind of dessert that brings people together. Whether it’s a Southern classic or a family tradition, there’s something about the smooth, creamy pudding combined with fresh bananas and crunchy vanilla wafers that hits the spot every time. The texture is just perfect—rich, velvety, and comforting—while the sweetness of ripe bananas and the crunch of the wafers create a dynamic flavor profile. If you’re craving a simple yet delicious dessert, this recipe is your go-to.
In this article, we’ll dive into the details of making the perfect banana pudding with vanilla wafers. We’ll cover everything from the ingredients you need to the steps required to create the creamiest, most indulgent dessert. Whether you’re making it for a family gathering, a holiday, or just because you need a little sweet treat, you’ll find all the tips you need to make it shine.
Let’s start by exploring what makes banana pudding with vanilla wafers so irresistible!
What Is Banana Pudding with Vanilla Wafers?
At its core, banana pudding with vanilla wafers is a layered dessert that combines three simple elements: vanilla wafers, fresh bananas, and pudding. It’s typically made with a creamy, custard-like pudding base that’s silky smooth and sweet, with just a hint of vanilla flavor. Then, you add the bananas—sliced fresh bananas that become soft and sweet as they soak in the pudding. Lastly, the vanilla wafers add a delicious crunch and soak up some of the pudding’s flavors, creating an overall texture that’s simply divine.
This dessert has been a beloved staple in Southern kitchens for decades. Whether you’re from the South or just love Southern cuisine, you’re likely familiar with this dessert’s appeal. But what makes it stand out is its versatility. You can make it with different variations, whether you prefer your pudding thick and custard-like, or more like a lighter, fluffy mousse. Plus, it’s one of those desserts that gets better as it sits—let the flavors meld together for a bit, and you’ll have a pudding that’s even richer and more flavorful.
Why You Should Try This Recipe for Banana Pudding with Vanilla Wafers
There’s something undeniably satisfying about the classic banana pudding with vanilla wafers. Not only is it super easy to make, but it also tastes like comfort in a bowl. Whether you’re an experienced baker or a beginner in the kitchen, this dessert is a great starting point. The beauty of this recipe lies in its simplicity. With just a few common ingredients, you can have a creamy, decadent pudding that will impress everyone at the table.
Another great thing about this banana pudding recipe is its flexibility. You can easily adjust it to suit your tastes, whether you want a sweeter pudding or a more subtle flavor. If you’re making it for a crowd, it’s easy to scale the recipe up. Plus, it’s the kind of dessert that can be served for any occasion—family dinners, potlucks, or even as an afternoon snack. There’s never a wrong time for a bowl of creamy, dreamy banana pudding.
Ready to dive into the recipe and make your own batch of this crowd-pleasing dessert? In the next section, we’ll take a look at the ingredients you’ll need to get started!
Ingredients for Banana Pudding with Vanilla Wafers

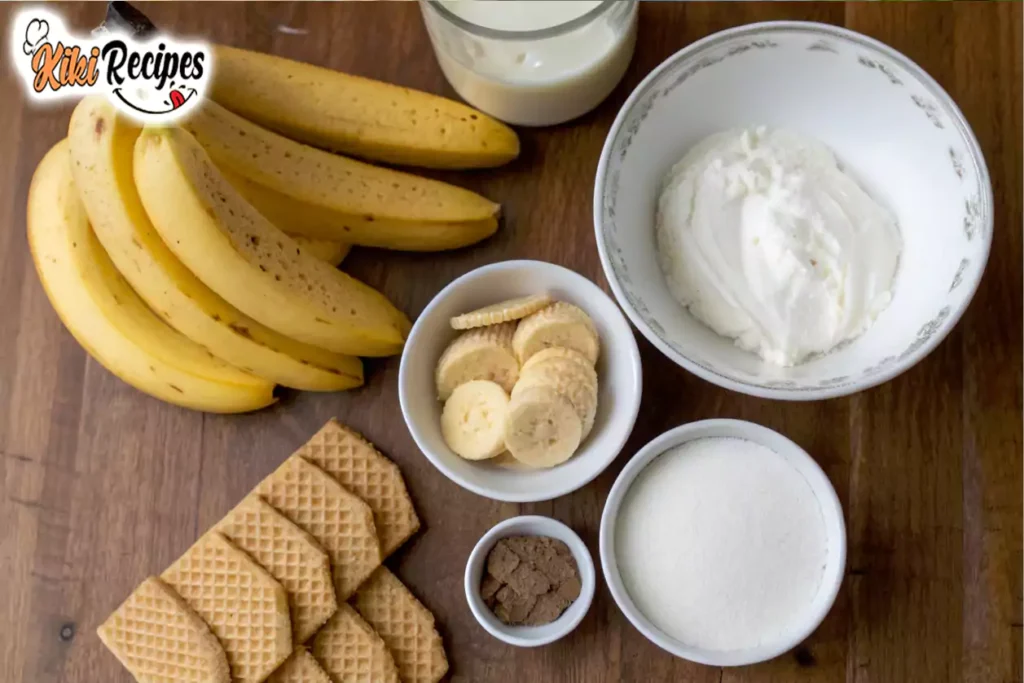
Now that you’re eager to make this classic dessert, let’s talk about the essential ingredients you’ll need for the perfect banana pudding with vanilla wafers. Don’t worry—this is a simple recipe that doesn’t require any fancy or hard-to-find ingredients. With just a few pantry staples and fresh bananas, you can create a pudding that’s creamy, indulgent, and full of flavor.
Essential Ingredients for the Perfect Banana Pudding To get started, let’s talk about the core ingredients that make up the base of the pudding:
- Bananas: The star of the show! Choose ripe, but not overripe, bananas for the best flavor and texture. Overripe bananas will mush too easily, making the pudding watery. You want bananas that are firm enough to slice but ripe enough to bring out their natural sweetness.
- Vanilla Wafers: These iconic little cookies are the perfect addition to this dessert. Their crunchiness adds a delightful contrast to the creamy pudding and soft bananas. You can use Nilla Wafers, or if you’re looking for a healthier option, you can use whole wheat or gluten-free vanilla wafers.
- Whole Milk & Heavy Cream: The combination of whole milk and heavy cream provides that luxurious, smooth texture you want in a pudding. The heavy cream adds richness, while the milk keeps it from being too thick. If you want a slightly lighter pudding, you can substitute some of the cream for more milk.
- Granulated Sugar: Just a bit of sugar is enough to sweeten the pudding. You can also adjust the sweetness depending on how ripe your bananas are. If you prefer a less sweet pudding, feel free to cut back on the sugar.
- Vanilla Extract: Pure vanilla extract gives the pudding its signature flavor. It’s essential to use pure extract for the most authentic taste; imitation vanilla won’t provide the same depth of flavor.
- Egg Yolks: These are crucial for thickening the pudding. They give the dessert that custard-like texture and help create a smooth, velvety consistency.
- Cornstarch: This is a thickening agent that helps the pudding set perfectly. While egg yolks do most of the thickening, cornstarch ensures the pudding holds its shape without becoming too runny.
Optional Additions While the classic ingredients are enough to make a fantastic banana pudding, here are a few optional add-ins to elevate your dessert even further:
- Whipped Cream: Topping your banana pudding with a generous dollop of fresh whipped cream adds an extra layer of sweetness and richness. It’s totally optional but highly recommended if you want to take your pudding to the next level.
- Salt: Just a pinch of salt can bring out the sweetness and balance the flavors in the pudding. It’s a secret ingredient that makes everything taste just right.
- Caramel or Chocolate Drizzle: For a little extra flair, you can add a drizzle of caramel sauce or chocolate syrup. This adds a touch of indulgence and makes your banana pudding feel a bit more gourmet.
- Coconut Flakes: For an added layer of texture, sprinkle some toasted coconut flakes on top. This tropical twist pairs wonderfully with the bananas and vanilla wafers.
How to Make Banana Pudding with Vanilla Wafers
Now that you have all your ingredients ready, it’s time to bring this delicious banana pudding with vanilla wafers to life! The process is simple and fun, and with a little patience, you’ll have a dessert that’s rich, creamy, and layered with flavor. In this section, we’ll guide you step-by-step on how to make the best banana pudding from scratch.
Preparing the Pudding Base
The first step in creating this creamy banana pudding is to prepare the pudding base. This is where the magic happens!
- Combine the dry ingredients: In a medium saucepan, whisk together the granulated sugar, cornstarch, and a pinch of salt. This helps prevent the cornstarch from clumping when it’s added to the milk and eggs.
- Mix in the wet ingredients: Gradually pour in the whole milk and heavy cream, whisking constantly to avoid lumps. Turn the heat to medium and cook, stirring often, until the mixture begins to thicken. This could take around 5-8 minutes.
- Temper the egg yolks: In a separate bowl, beat the egg yolks. To avoid scrambling the eggs, slowly pour a small amount of the hot milk mixture into the eggs, whisking constantly. Once the eggs are warmed up, pour them back into the saucepan with the rest of the milk mixture.
- Cook the custard: Continue to cook the mixture over medium heat, stirring constantly, until it thickens to a custard-like consistency. This usually takes 2-3 more minutes. The pudding should coat the back of a spoon when it’s ready.
- Add the vanilla: Once thickened, remove the pudding from the heat and stir in the vanilla extract. This step enhances the overall flavor, giving the pudding that sweet, comforting vanilla kick.
Layering the Banana Pudding with Vanilla Wafers
Layering is the key to a perfectly textured banana pudding. Here’s how to assemble the dessert:
- Prepare the bananas: Slice your bananas into thin rounds, aiming for about ¼-inch thick slices. You’ll want to use ripe, but not overly ripe bananas—this gives the pudding a fresh, sweet flavor without making it too mushy.
- Start the layering: In a 9×9-inch baking dish (or similar), lay a layer of vanilla wafers at the bottom of the dish. Arrange the cookies so they cover the bottom evenly. If you’re using gluten-free or whole wheat wafers, that’s fine—just make sure they’re evenly distributed.
- Add a layer of bananas: After the wafers, add a layer of banana slices. Arrange them in a single, even layer on top of the wafers, making sure they’re spread out evenly.
- Add the pudding: Spoon a generous amount of your prepared pudding over the bananas and wafers. Use the back of a spoon to spread it evenly. You want the pudding to cover all the bananas and wafers completely.
- Repeat the layers: Continue layering in this order: vanilla wafers, banana slices, and pudding. Aim for at least two or three layers, depending on the size of your dish. For the top layer, make sure you finish with pudding, as it will set beautifully.
- Step 3: Setting the Pudding
2
Now comes the hardest part: waiting. While the pudding tastes great right away, letting it sit in the fridge allows the flavors to develop and the wafers to soften, creating that signature texture everyone loves.
- Refrigerate the pudding: Cover the banana pudding with plastic wrap or a lid, and place it in the fridge. Ideally, you’ll want to refrigerate it for at least 4 hours, but overnight is even better. This gives the pudding enough time to set up and become thicker while letting the vanilla wafers soften just the right amount.
- Allow the wafers to soak: The vanilla wafers will absorb some of the pudding’s liquid, becoming soft and cake-like, while still maintaining a bit of their original texture. The result is a dessert with layers of creamy pudding, fresh bananas, and deliciously softened wafers.
Serving and Garnishing

Once your banana pudding has set and is chilled to perfection, it’s time to serve and enjoy!
- Garnish with whipped cream: Spoon generous portions of pudding into bowls or individual cups, then top with a dollop of whipped cream for an extra creamy finish. You can either use store-bought whipped cream or make your own for a richer flavor.
- Optional garnishes: If you want to get creative, consider adding some toasted coconut flakes or a few crushed vanilla wafers on top for texture. For a fun twist, a drizzle of chocolate syrup or caramel sauce can elevate the dessert, adding a rich, sweet layer.
- Serve chilled: Serve your banana pudding chilled, straight from the fridge, for the best flavor and texture. It’s perfect for summer BBQs, family gatherings, or as a comforting treat after dinner.
With all of these steps, you’ll have created a creamy, delicious banana pudding that’s sure to satisfy anyone with a sweet tooth.
FAQs: Answers to Common Questions About Banana Pudding with Vanilla Wafers
What keeps bananas from turning brown in banana pudding?
Bananas naturally turn brown due to oxidation when exposed to air. To prevent this in your banana pudding, you can toss the banana slices in lemon juice or citric acid before layering them in the pudding. The acidity helps slow down the oxidation process. Another tip is to serve the pudding right away after assembling, as the bananas will last longer if they’re covered by the creamy pudding. This way, they’re less exposed to air, and you get a beautiful, fresh appearance for a longer period.
What is a substitute for Nilla wafers in Canada?
If you’re in Canada and having trouble finding Nilla Wafers, don’t worry—there are plenty of alternatives! You can use any type of vanilla-flavored cookies or biscuits that are similar in texture and sweetness. Leclerc and President’s Choice brands offer vanilla cookies that can work in place of Nilla Wafers. Shortbread cookies or even graham crackers can also be used, though the texture may differ slightly. These substitutes will still provide that satisfying crunch you need in the banana pudding.
How do you keep banana pudding from getting watery?
To avoid watery banana pudding, be sure to follow a few simple tips. Make sure the pudding thickens properly before layering it, which usually means cooking it until it coats the back of a spoon. If you find your pudding too runny, you can add a little extra cornstarch or reduce the amount of liquid next time. Additionally, use fresh bananas, and make sure they’re not overly ripe. Overripe bananas tend to release excess moisture, making the pudding watery. Lastly, giving the pudding time to set in the fridge will allow the vanilla wafers to absorb some of the moisture, thickening the dessert.
Can you use sweetened condensed milk instead of milk in pudding?
Yes, you can substitute sweetened condensed milk for regular milk in your banana pudding recipe. However, keep in mind that sweetened condensed milk is much sweeter and thicker than regular milk, so you may need to adjust the amount of sugar you add. If you prefer a less-sweet pudding, reduce the sugar to balance the flavor. Using sweetened condensed milk can give your banana pudding an extra rich and creamy texture, but it will also make the pudding more indulgent. Just be mindful of the sweetness level!
Conclusion: Enjoy Your Perfect Banana Pudding with Vanilla Wafers
And there you have it! The ultimate recipe for banana pudding with vanilla wafers, made easy, delicious, and ready to impress. From the creamy, indulgent pudding base to the layers of fresh bananas and crunchy vanilla wafers, this dessert is perfect for any occasion, whether it’s a family gathering, holiday dinner, or simply a comforting treat to enjoy at home.
With simple, fresh ingredients and just a few easy steps, you can create a dessert that tastes like it’s been passed down for generations. Whether you stick to the classic recipe or experiment with a few optional add-ins, this banana pudding will always be a crowd-pleaser. Don’t forget to garnish with whipped cream or toasted coconut for an extra touch of flavor!
By following the tips and tricks we’ve shared, you’ll ensure that your banana pudding is thick, creamy, and bursting with sweet flavor. So go ahead, give this recipe a try, and enjoy a slice of homemade banana pudding with vanilla wafers that’s sure to become a favorite in your household.
You’ll Also Love
Ultimate Peanut Butter Brownie Recipe: A Decadent Chocolate and Peanut Butter Dessert

